Showing posts with label Meals - Chicken. Show all posts

Wednesday, October 12, 2011

Braised Black Vinegar Chicken


I saw this recipe of Braised Black Vinegar Chicken over at Little Corner of Mine. I love it when I find recipes for ingredients or items which I have in the pantry, but are not used frequently. In this case, Black Vinegar. The man and the boys love this dish. They love the gravy in their rice. And I'm sure my father-in-law will like this dish too, as the chicken is cooked till very soft. Good for the elderly who has problem chewing their food.

In fact, I have been cooking this dish for a while. But I just realised that I did not post the recipe on my blog! This is such a simple dish, I'm sure once you try it, you will cook it frequently! I omit the green onions, an item which I do not have in my pantry most of the time. Since the boys do not take spicy food, I left out the chilli (though I love spicy food!). Sometimes, I add some sliced carrots in to cook with the chicken.


Ingredients

8 Drumsticks, or
12 Chicken Wings (3 joint, cut and discard tip)
10pcs Black Mushroom (soften in hot water)
3 Shallots, slice
1 Small piece of Ginger, slice
2 Carrots (cubed or sliced, optional)


Seasoning

2tbsp Black Vinegar
3tbsp ABC Sweet Sauce (Kecap Manis)
1tbsp Light Soy Sauce (I use Low-Sodium Soy Sauce)
1tsp Sugar
10oz Water (I use water for soaking mushroom plus water, just enough to cover chicken)

1 tsp Sesame oil and enough vegetable/cooking oil for frying the chicken


  • Wash the dried mushrooms.
  • Reconstitute the dried mushrooms in hot water.
  • When soften, remove the mushrooms and cut them into smaller pieces.
  • Pour the water for soaking the mushrooms through a sieve, to remove the impurities. Add more water to get about 10oz of fluid. Set aside the water for later use.
  • In a pot, if you have a big one, add the sesame and cooking oil. I do not have a big enough pot, so I use a wok, and later, transfer the chicken drumsticks with the sauce into a pot to braise.
  • When the oils are hot, add the shallots and ginger slices.
  • Fry till fragrant.
  • Add the chicken pieces and fry for while.
  • Add the mushroom pieces and mix well.
  • Add the water for soaking mushroom and water (together adds up to 10oz) and the seasonings.
  • Let it boil for a while.


  • If using a wok, transfer the contents into a pot and continue to let it simmer for an hour or till the chicken pieces are cooked through. Cook longer if you want the meat to be really soft.
  • If you are already using a pot to fry the chicken pieces, then just let it simmer for an hour or till the chicken is cooked.
  • If adding carrots, add them half an hour into the cooking time, since carrots cook faster than chicken.

A great dish to cook ahead of time. All you need to do is warm it up during dinner. Now that I have finally posted the recipe, I don't have to look for it through my long list of bookmarked recipes the next time I cook it =D Enjoy!

Monday, May 9, 2011

Vroom, Vroom!


Monday blues! This syndrome does not affect working moms. It affects stay-home-moms too! The best way to beat the blues? Use the oven to do the cooking, especially when cooking in the early hours of the morning!

In the bento, we have blanched florets of broccoli, oven-baked chicken thigh fillets, marinated in soy sauce and a little honey, and oven-baked baby corn. Add the baby corn towards the end of baking the chicken thigh fillets, and you get a meal that requires minimum washing up =)

I just love these little cutters! Comes in handy on days when I have no time to prepare my "lunch homework". Just cut and arrange! Love it!

Friday, April 22, 2011

Chicken Kijiyaki


My new book has finally arrived! It had been six weeks since I placed my order with Amazon. I was eager to try out some new recipes. The recipe for Chicken Kijiyaki caught my eye as I flipped the pages.


I tried it out for lunch, since it's Spring Break for the boys. Just as what the book had stated, the skin was crispy and yummy. Be very careful about the heat, as you don't want to burn the chicken and have it leave a bitter after-taste =)

Recipe adapted from The Just Bento Cookbook by Mikiko Itoh

2 pcs Boneless Chicken Thighs with skin on
1 tbsp Mirin
1 tbsp Soy Sauce (I use low-sodium soy)
1 tsp Sugar
Shichimi Pepper, to taste (I omit this)

  • Debone and clean the chicken thighs.
  • Pat dry with a kitchen towel.
  • Actually, my deboned and cleaned chicken thighs were kept frozen in the fridge. I took them out to thaw the day before. Hence, all I need to do in the morning was to give them a quick rinse and pat dry them with a kitchen towel.
  • Pierce the chicken all over on the skin with the tip of your knife. This will prevent the chicken pieces from curling up during the cooking.
  • Place a dry non-stick pan over high heat.
  • Put in the chicken, skin side down.
  • Fry till the skin is brown and crispy, pressing down on the chicken occasionally with a spatula.
  • Turn the chicken pieces over. Cook till done.
  • During the cooking, if the pan became too oily, you can use a paper towel to soak up the oil.
  • You may want to lower the heat to prevent the chicken from burning.
  • The chicken is done when you poke the middle with a knife tip and the juices run clear.
  • Remove the chicken pieces from the pan and wipe the pan clean with a paper towel.
  • Put the sauce ingredients into the pan, using medium-high heat, and stir until he sugar is melted.
  • When the sauce is bubbling, return the chicken pieces to the pan.
  • Coat the chicken pieces on both sides with the sauce.
  • Remove from the pan to a plate and let cool.
  • Slice and pack.
  • Sprinkle with shichimi pepper if need.

The boys just love the chicken. Crispy on the skin as well as on the other! They each had a chicken thigh, and they wiped their lunch plate clean. This is going to be a regular in their lunch bento!

Sunday, April 3, 2011

Braised Kecap Manis Chicken


I bought a small bottle of Kecap Manis from the asian mart last weekend. So far, I had used it for Nasi Goreng (non-spicy version). I knew I could use it for chicken, just that I was not sure how. A google search brought me to the recipe of Braised Sweet Soy Sauce Chicken at PigPig'sCorner. The sweet soy sauce refers to Kecap Manis. I was delighted and decided to give it a try, since it was supposed to be similar to Tau You Bak! The best part of this dish? Put everything into a big pot and let it cook! No frying, no mess!


So here's the soy sauce and bottle of Kecap Manis. I was happy to peel and crush the many cloves of garlic, and then sliced the ginger.


And soaked the chinese mushrooms too.
Reserve that water from soaking the mushrooms.


8 pcs 3-joint Chicken Wings, cut and separated
12 pcs Dried Chinese Mushrooms, soaked
3/4 cup Kecap Manis
3 tbsp Light Soy Sauce
1 tsp 5-Spice Powder
1 tsp White Pepper
3 stalks Spring Onions (I omit this as I don't have it at hand)
15 slices Ginger
1 bulb Garlic, Peeled and Crushed


  • Cut and separate the drumstick, wings and tips from the chicken pieces.
  • Discard the tip.
  • Wash and clean the chicken pieces.
  • Put them into a big pot.
  • Wash the dried chinese mushrooms.
  • Soak the dried chinese mushrooms in warm water for about 20 minutes.
  • Remove the mushrooms and reserve the water for later use.
  • Place all the other ingredients, excluding the water for soaking mushrooms, into the pot.
  • Add the mushroom water, enough to cover the all the ingredients in the pot. If you do not have enough mushroom water, add water.
  • Give the contents in the pot a quick stir to mix well.
  • Leave for at least an hour.
  • When ready to cook, bring the pot to a boil.
  • Reduce heat and let simmer for an hour to 1.5 hours, or till meat is cooked and tender.

The ingredients were prepared in the morning, while my boys were at school, and left to marinate till the evening. In the evening, as the pot of liquid bubbled away, I was free to supervise my boys in their Chinese homework. After one and a half hour of simmering, the chicken pieces were cooked, and were very tender. Although quite a fair amount of liquid was used to cover the ingredients at the start, half the amount of liquid had evaporated at the end of the one and a half hours. Just enough for us to drizzle the sauce on our rice ... yum yum!

This is such an easy dish to prepare. It is definitely a keeper, and a regular on my dinner table!

Wednesday, March 23, 2011

Rain, Rain, Go Away


It's another day of rain and wind. The sun had gone into hiding again. Needless to say, the temperature had dipped. I dislike it when it rains, especially when the wind is blowing crazily. The biting wind gets through the gloves while you desperately hang on to your umbrella. The umbrella will turn upside down if you don't hold onto it tightly.

In the bento, we have florets of broccoli, and panfried cubed chicken thigh fillets. The cubed chicken fillets were coated with cornflour before frying. In the cornstarch, I added some paprika, dried parsley flakes, onion powder and sea salt.

Let's hope the weather warm up soon!

Monday, March 21, 2011

Ferb


Ferb, from the cartoon Phineas and Ferb. My boys used to love watching this cartoon. Why Ferb, and not Phineas?

Well, I love that Ferb has green hair! All I needed to do was to trim the floret of broccoli and stick it into the rice! And he's got a bigger and longer face than Phineas. Just the right size to cover the rice partially. The face was assembled while the chicken was baking in the oven.


In the bento, there is ovenbaked Rotisserie Chicken Thigh Fillets, ovenbaked baby corn, rice, carrots and broccoli. I love using the oven to bake the chicken thigh fillets. Minimum cleaning up. This bottle of McCormick Rotisserie Chicken seasoning is a must-have in my pantry.

  • Debone the 2 chicken thighs, clean and pat dry with a paper kitchen towel. Do note that the cooking time will be longer if you can chose not to debone the chicken thigh.
  • Line a baking tray with parchment paper.
  • Sprinkle the seasoning on both sides of the chicken thigh fillets.
  • Place the fillets in the tray with the skin side up.
  • Spray a little cooking oil onto the skin of the fillets.
  • Bake in the oven at 400F for about 25 minutes.
  • Coat the baby corn with some oil.
  • Season with a little sea salt.
  • Place the baby corn into the tray of chicken fillet, 15 minutes into baking the chicken thigh fillets.
  • Remove the tray of chicken fillets and baby corn from the oven when done. Let cool and cut chicken fillet into strips before putting them in the lunchbox.

If you bake the chicken fillets long enough, the skin will be crispy. Do not spray too much oil onto the skin, as oil does come out from the chicken during baking. You don't want your chicken fillets to be soaking in oil when cooked.

Time to search for more ovenbaked chicken recipes!

Sunday, March 20, 2011

Rice Cooker Chicken


Since it was just me and the kids eating lunch today, I took a shortcut and used the rice-cooker to cook the rice, and the chicken! It's a fuss-free meal with minimum washing up =)


The chicken pieces were already cleaned and cubed. I took the bag of chicken cubes out from the freezer to thaw in the fridge yesterday. This morning, all I needed to do was to take the bag out of the fridge, marinate, mix with some mini sweet peppers, put them on a foil and send into the rice cooker to cook!

2 pcs Chicken Thigh Fillets, deboned and cubed
2 tbsp Low Sodium Soy Sauce
1 tbsp Mirin
4 Mini Sweet Peppers, cut into thin strips
1 cup Chicken Stock (Approximate amount)

  • In a bowl, marinate chicken cubes with soy sauce and mirin for about 15 minutes.
  • Cut the mini sweet peppers into thin strips.
  • Transfer chicken pieces onto a big piece of aluminium foil.
  • Add the peppers.
  • Fold the sides and pour enough chicken stock to slightly cover the chicken pieces.
  • Make sure the chicken pieces are spread out, for even cooking.
  • Seal the package and transfer onto the steamer.
  • Place steamer into rice cooker and press the button to start cooking the rice and the chicken.


The steamer has holes that allow the steam (from cooking the rice) to pass through, hence helping to cook the foil bag of chicken pieces. Alternatively, if you do not have a steamer that comes with the rice cooker, you can place the foil bag on the rice itself. Whether you are using a steamer or placing the foil bag on the rice directly, this cooking method works for small amount of chicken.

Me and the kids love the sauce from the chicken! The boys asked for an extra helping of rice and sauce. They love the sauce over their rice and blanched broccoli. I could taste the sweetness of the peppers in the sauce. This is going to be the "Must Have" dish when hubby is not having his lunch/dinner with us =)

Saturday, March 12, 2011

Parmesan and Panko Chicken Thighs


On days when I am feeling exhausted, the oven does most of the cooking.
It saves me the hassle of having to wipe the stove top, to wash my big frying wok, to wipe the oil splatter off the side table .... the list goes on. All I need to do, with oven baking, is to wash the baking tray!

The recipe for Oven Fried Chicken Thighs with Parmesan and Panko was adapted from About.com. I made some changes to the recipe. The original recipe can be found here.

We all love the crispy panko on the chicken thighs!
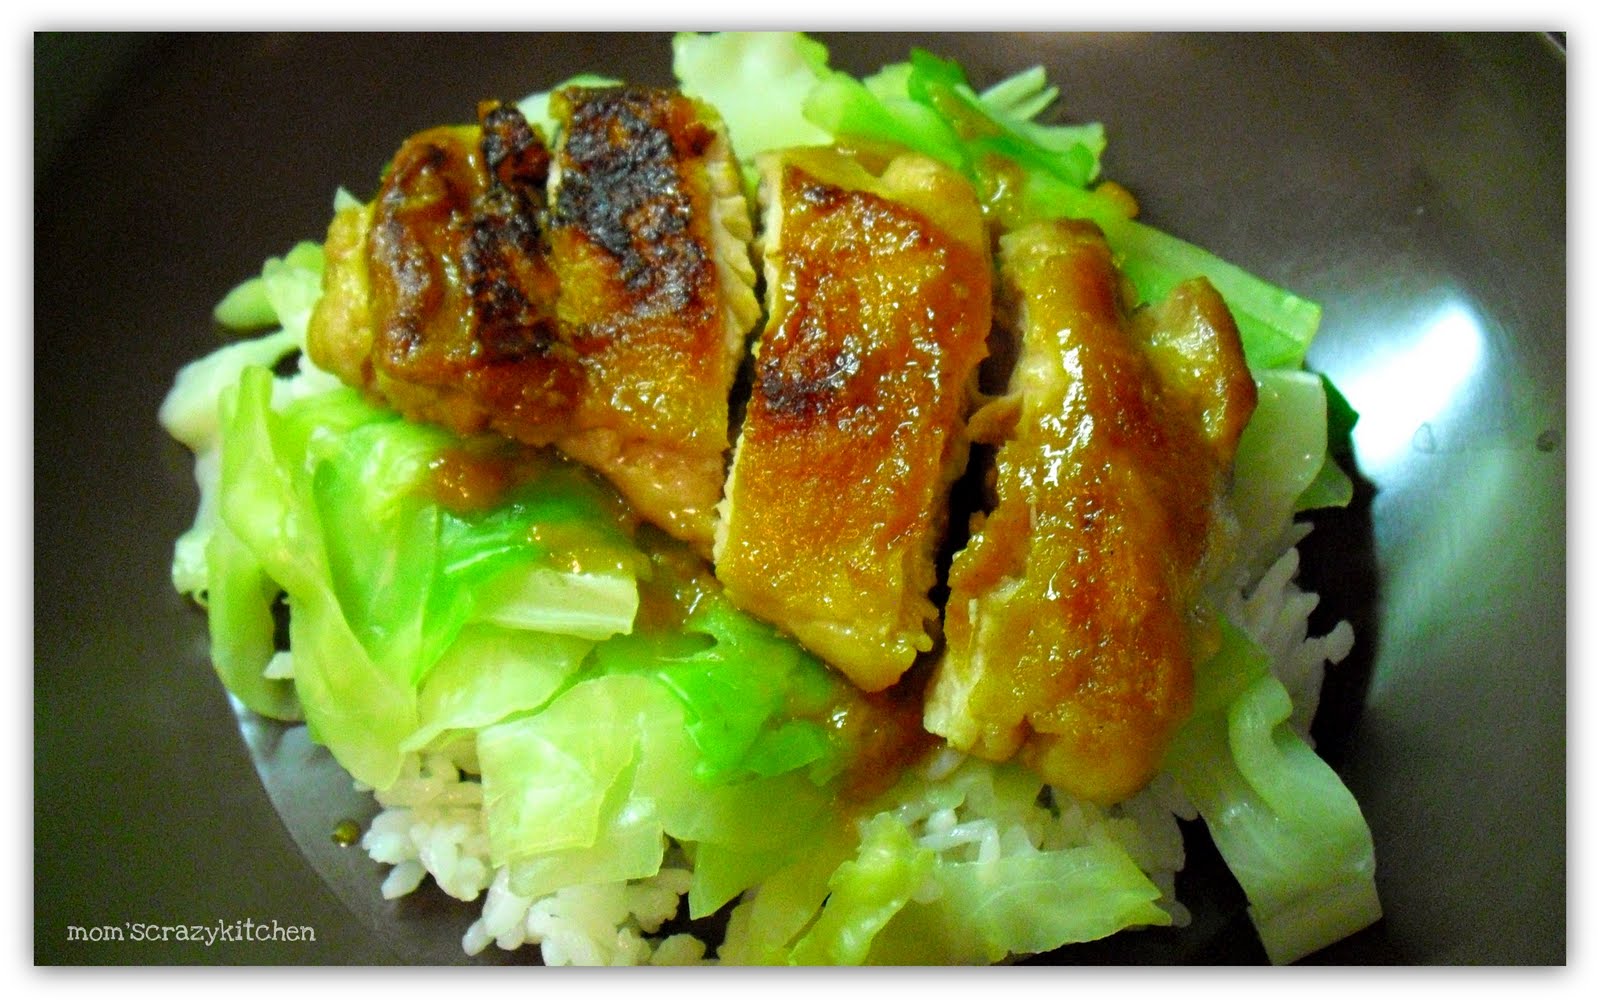
Darling son KW thought he was having pork chop, and was wondering why the pork chop was so thick.


4 Chicken Thighs
2 tbsp Butter, melted
1 tsp Honey or maple syrup
1/4 tsp Garlic Powder
1/3 cup Shredded Parmesan Cheese (I use grated parm. cheese)
1 1/4 cups Panko Crumbs
1/4 tsp Sea Salt
1 tsp Dried Parsley Flakes
1/4 tsp Paprika


  • Heat oven to 400F.
  • Line a baking tray with parchment paper.
  • Wash chicken thighs and trim excess fat and skin.
  • Pat dry and sprinkle with sea salt.
  • In a shallow bowl, combine melted butter, honey and garlic powder.
  • In another bowl, combine panko, parmesan cheese, salt, dried parsley flakes and paprika.
  • Brush or rub chicken thighs with butter mixture.
  • Press all sides of the chicken thigh into the panko mixture to coat thoroughly.
  • Place on prepared baking tray.
  • Bake for 35-40 minutes, or till juices run clear when chicken is pierced with a fork.

I did not follow the amount stated for panko and the grated parmesan cheese. In fact, I had more panko mixture than required. It was a waste to throw it away, so I used the leftover panko mixture to coat florets of cauliflower! Yes, I send the tray of panko coated cauliflower into the oven to bake, even though I had already prepared a vegetable dish for dinner. It's good to eat more vegetables, don't you think?


  • Wash and drain the florets of cauliflower.
  • Pour a little olive oil to coat the florets of cauliflower.
  • Pour the leftover panko mixture into the bowl of cauliflower.
  • Mix well, transfer to a baking tray lined with parchement paper.
  • Bake the vegetables together with the chicken thighs.
  • The cooking time for cauliflower will be shorter than that of the chicken thighs, so keep an eye on both trays.
  • Instead of using two separate trays, you could, during the last 15 minutes of baking the chicken thighs, transfer the panko coated uncooked cauliflower into the baking tray that holds the chicken thighs. That is provided your tray is big enough to hold the chicken thighs and cauliflower, all in one!

Darling son YW obediently ate up his portion of cauliflower, and asked for more! He loved the panko crumbs, which fell from the cauliflower, onto his rice. Yummy, he said. I will definitely make this dish again!

Friday, March 11, 2011

Bert and Bert


How do you like this family portrait of Bert and Bert? These two brothers live on Sesame Street and are good friends with Ernie =)


In the bento, we have blanched broccoli florets and oven-baked soy-honey chicken thigh fillet. What are those black strips behind Bert, on top of the rice?


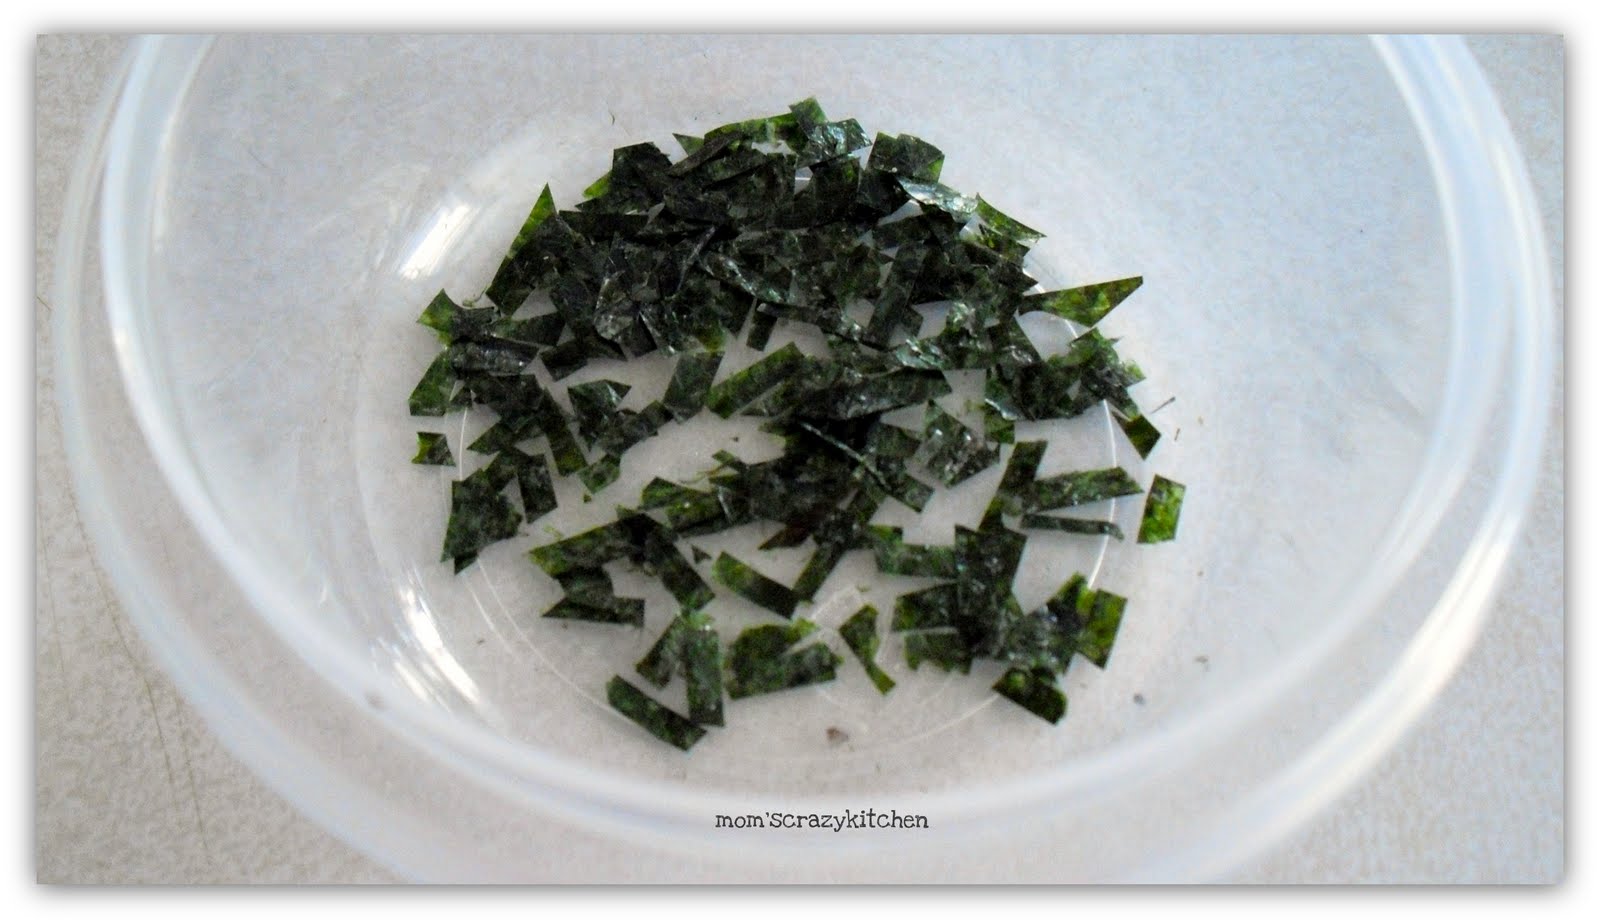
I cut the piece of nori used for Bert's mouth, brow and eyes into small strips. Then I sprinkled them over the rice. No wastage =)


And I sprinkled some onto the rice in Hubby dear's lunchbox! What's in his lunchbox? Along with rice, he gets broiled chicken wings and stir-fried broccoli and mini sweet peppers.


Clean the wings and pat dry with a paper kitchen towel.
Generously sprinkle some sea salt over the wings.
Season with a little ground black pepper and paprika.
Transfer the wings to a rack with a drip pan.
Place the rack at least 6 inches away from the broiler.
Broil the wings for 10 minutes.
Turn the wings over and broil for another 10 minutes.
Each oven is different, so the broiling time may be shorter or longer.
Remove when done and let cool before packing into the lunchbox.


Add a little oil to a hot frying pan.
Add minced garlic to the oil.
Fry the garlic till fragrant.
Add the sliced mini sweet peppers.
Give it a quick stir and leave it to cook for a couple of seconds.
Add broccoli florets.
Add a little water. Just enough to cook the vegetables.
Mix well and let the vegetables cook.
When the vegetables are cooked, add some sea salt to taste.

I put the vegetables into cups, as I did not wish to have the sauce from the vegetables mixing with the chicken wings. Hence, I used only a little water to cook the vegetables. However, if you are cooking this dish for dinner, and like to have a little more sauce in the dish, then add more water/chicken stock to cook the vegetables. You can also use oyster sauce in place of sea salt.


The weather this morning was just gorgeous! The sun was shinning brightly and cheerfully, and the temperature was just above zero degree Celsius! Nice and cool weather! I looked out of the living room window and saw the shadow of the tree on the wall .... lovely!


And check out the shadow of the tree on the snow covered ground! Beautiful! I'm looking forward to the arrival of Lady Spring, although the 2 inches of snow accumulated yesterday remind me of how beautiful Winter can be.

Tuesday, February 15, 2011

The "Starry" Dark Side


When you think of Star Wars, you think of Darth Vader, Yoda and the Jedi. Darth Vader may be from the Dark Side, but he is no doubt the "Star" there.

I bought the Darth Vader cupcake rings and light saber from ShopBakersNook. There is also the Storm Trooper cupcake ring. My boys were very excited to see these rings and food picks, and half of my purchases ended up with them. They kept asking me "Will you be using the light saber in the lunchbox any time soon?".

It was not that difficult to make the body of Darth Vader. I did a sushi roll, without any filling, although I did seasoned the rice with some sushi vinegar. It was a long and thin roll, just the right size for his body. Cut the two ends so that it fits nicely into the lunchbox. A slit across the roll near one end of the roll nicely fit the cupcake ring. There, we have our head attached, and the body. I cut another sheet of nori to put over the roll, so that Darth Vader now has his cloak on. While trying to get the roll into the box, I accidentally tore a corner of his cloak! So you see a star over the corner of the cloak, which nicely hid the torn portion =)

In the Bento, we have a rice roll, some florets of cauliflower, and pan fried chicken thigh fillet in black bean and garlic sauce (mixed with some sugar). The chicken pieces were put on a leaf of lettuce, so that the oil would not soften the nori holding the rice roll.

May the force be with you!

Monday, February 14, 2011

Happy Valentine's Day!


It's Monday, and it's Valentine's Day. Happy Valentine's Day!

The boys were looking forward to school this morning. They would be having a Valentine's Day class party today, and exchanging Valentines with their friends, to say "Thanks" to their friends for their friendship =)


In the Bento ... Pan-fried chicken thigh, a small piece of SPAM as the tree trunk and branch, broccoli florets, and overnight rice fried with egg.

I marinated the chicken thighs with some miso paste, sugar, mirin and soy sauce. The bag of marinated chicken thighs was left in the fridge overnight. Discard the marinade this morning, and pan fried the chicken thighs till cooked, and the skin crispy. Remember to cook on low to medium heat, as you don't want to burn those chicken thighs!

A joke Darling son KW brought home after his class party ...
Question: What kind of hat do cupids wear at construction sites?
Answer: A "Heart" Hat =)

Hope you have a great day today!

Sunday, February 13, 2011

Cooker-Claypot Rice


I was feeling lazy. The idea of using the rice cooker to do all the cooking was very appealing. Hence, I did a "cheater's" version of the claypot rice, without the cured meat.


3 tbsp Vegetarian Oyster Sauce
1 tbsp Dark Soy Sauce
1 tbsp Sesame Oil
8 pcs Dried Chinese Mushrooms

4 pcs Chicken thigh fillet (Deboned, skin removed, cubed)
2 cups Uncooked Rice
4-5 cloves Garlic


  • Debone and remove the skin from the chicken thigh fillet if necessary.
  • Wash and pat dry. Cut the fillet into bite size pieces.
  • Reconstitute the dried chinese mushrooms in warm, about 20 minutes.
  • Cut the softened chinese mushrooms into strips.
  • Put the mushrooms and cubed chicken pieces in a bowl.
  • Marinate the mushrooms and chicken pieces for at least 30 minutes.
  • Wash the rice, and add water accordingly.
  • Add the chicken and mushroom to the rice, together with the marinade.
  • Remove the skin from the garlic cloves.
  • Press the garlic with the back of the knife to "flatten" it.
  • Add the garlic to the rice, chicken and mushroom.
  • Set the rice cooker and cook.
  • When the rice is cooked, break up the garlic, fluff the rice and mix well. Serve the rice warm, along side with some vegetables.

You can set the rice cooker, go out for your grocery shopping, or bring the kids for their morning swim class, and come home with lunch awaiting for you! A simple meal on a busy weekend!

Thursday, February 10, 2011

Bear-Hug


Are you ready for Valentine's Day? How about a Bear hug for you today?


In the Bento ... Rice seasoned with some Furikake, florets of broccoli, and pan-fried chicken.

The pan-fried chicken pieces were marinated with some miso paste, honey and shaoxing wine. It was then left in the fridge to marinate overnight. I melted some butter in the frying pan, and together with a little olive oil, panfried the chicken pieces till cooked and browned. Left them on a kitchen towel to soak up the excess oil before I packed them into the lunchboxes.


Tweet, Tweet, Tweet! Someone from the other box is smiling at me!


Hello! I'm Mr Prawn, and I have some work to do in the other bigger box!


Here's the lunchbox for hubby dear. The rest of the chicken pieces were packed into his lunchbox. I added some prawns, cooked in salted water, and cauliflower. He definitely wouldn't want a Bear Hug, so a worker prawn should work fine for him =)


Monday, February 7, 2011

Three Bears .... But Where Is Goldilocks?


Yes, the three bears are looking for Goldilocks! They looked right .....


They looked left ... they looked everywhere!
But there was still no sight of Goldilocks! Where did Goldilocks go?


In the bento ... Three Rice Balls, Broccoli Florets, Pan-Fried Teriyaki Chicken Thighs.

The chicken thighs pieces were marinated in some Shaoxing Wine, and left overnight in the fridge. This morning, I took out the bag of chicken pieces, discarded the liquid in the bag, and pan fried them in a pan coated with a little butter and olive oil. Make sure to cook the chicken pieces thoroughly. Once they browned, remove and leave on a kitchen towel to soak up the excess oil. Remove the excess oil in the frying pan with a kitchen towel. Pour the sweet sauce, comprising of 1 tablespoon of mirin, 1 tablespoon of soy sauce, and 1 teaspoon of sugar. Give it a quick stir, put the chicken pieces back in to the pan and coat the chicken pieces with the sauce. Left cool before packing into the lunch box.

I had 2 medium pieces of deboned and de-skined chicken thighs. Adjust the amount for the sweet sauce based on the number of chicken thighs you have.

Now that the three bears have gone to school, it's time for me to look for ... Goldilocks?

Wednesday, January 26, 2011

Meet the Makkuro Kurosuke!


Meet the Makkuro Kurosuke! I'm in love with these sooty little fellows!
I love the way they disappear in a flash in My Neighbor Totoro, and the way they work in the boiler room in Spirited Away =) And those big blinking eyes ... No wonder Satsuki and Mei shouted "Makkuro Kurosuke, come out! Or we'll poke your eyeballs out!".


In the lunchbox ... Rice balls, seasoned with a little sushi vinegar and covered with lots of shredded nori, chicken karagge, cauliflower and carrots. The blinking eyes were made from cheese and nori. I will definitely make them BIGGER the next time!

Preparing the chicken karagge didn't take up too much time. It was covering the rice balls with shredded nori that took up a bit more time than expected. It was kind of messy, but the boys were happy to see these sooty fellows in their lunch box. Thanks Anna, from AnnaTheRed, once again, for showing the "How To" in your very informative and creative blog! I'm in love your Totoro Bentos!

The first thing Darling son KW asked when he saw these sooty fellows was "Are they from Totoro?". And his next question was ...... "Are we getting Totoro tomorrow?". Hmm, will have to think about that while the boys are at school ....


Saturday, January 15, 2011

Pan Fried Chicken Donburi


This recipe is adapted from Kentaro Kobayashi's Easy Japanese Cooking, Donburi Mania. I love his cookbooks. The recipes are simple, and yet yield delicious meals!

Strictly speaking, mine is not served as a Donburi. My rice is not placed in a bowl, as the kids will probably spill the rice all over while trying to scoop the rice under the meat. A plate will be more convenient for them, and less mess for me =)

For this meal, I omitted the Japanese sweet peppers. Instead, I use the recipe for cooking the chicken thighs.

2 pcs Chicken thighs, bonelss and skin on, approximately 400g
salt and pepper
roasted seaweed

Mixture A
2 tbsp Water
1 tbsp miso
1 tbsp mirin
1/2 tbps Soy Sauce

  • Remove fat from chicken and poke several holes in skin with a knife tip. Make slicing cuts into skinless side, about 1 cm apart for more even cooking.
  • Heat pan and add 1 tablespoon of vegetable oil.
  • Place chicken thighs in pan, skin side down.
  • Sprinkle with salt and pepper, cover and cook on medium heat.
  • Once browned, turn chicken thighs over.
  • Cover again and cook slowly on medium heat.
  • Remove excess juices and oil from pan with a paper towel while cooking.
  • Once chicken is cooked through, turn skin side down once more.
  • Pour in 1/2 tablespoon oil around the edge of pan.
  • Cook on high heat until the skin is crispy.
  • Remove excess fat and juices again.
  • Pour in mixture A.
  • Coat both sides well.
  • Cut chicken into bite-size pieces.
  • Serve rice in bowls and cover with shredded pieces of roasted seaweed.
  • Top with the bite-size chicken pieces.

I like the taste of mixture A on the chicken. For bento use, I would probably cut the chicken thighs into bite size pieces before cooking, with the skin removed. Smaller pieces cook faster than a bigger piece, although the rich flavor keeps better in a chicken thigh cooked as a whole. Pan frying these smaller pieces will take a shorter time, and mixture A can be added towards to the end, when the pieces of chicken are cooked through.

I look forward to cooking it for my bento next week =)

Tuesday, January 11, 2011

A Promise. Echo-Echo.


I promised my little boy yesterday, that I would include Echo-Echo from Ben 10 Alien Force in his lunch today. He was really looking forward to it! I did my homework yesterday and came up with a sketch and template of Echo-Echo.


As usual, with the mad rush in the morning, I realised (again!) that I didn't have time to include the details, despite planning for it! The thin strips of nori were already cut, but I just didn't have the time (and stable hands) to put them on the figures. I was lucky to be able to include the eyes, cut from a leaf of lettuce, and the Ben 10 logo. Upon see his lunchbox, the little one said "Echo-Echo!". It's a "Pass", from my little teacher, for my assignment, I suppose?

The boys got an extra side dish for their lunch, apart from the usual meat and vegetable .... bacon wrapped asparagus!


I baked these bacon wrapped asparagus last night, to test if the boys like it. You don't want to include a new dish, only to have them bring home to you after school, untouched. Bacon is not exactly a healthy choice of food, but as long as we consume it in moderation, it works just fine. Another vegetable included in their diet, especially for Darling son KW, who requested that I "cut off the green part sticking out". He didn't mind popping the hidden asparagus into his mouth, since I cut the spear of asparagus into smaller chunks.


4 spears of Asparagus
2 slices of Bacon

  • Half the slice of bacon lengthwise.
  • From a slice of bacon, you now get two thin slices.
  • Remove tough end of asparagus.
  • Wash and pat dry the asparagus.
  • Wrap the half-sliced of bacon around the spear of asparagus.
  • Put the bacon wrapped asparagus in a lined tray.
  • Bake at 400F for about 20 minutes.
  • You may want to turn the spear of asparagus half way through cooking.

I didn't add any salt or pepper. The asparagus was soft and well seasoned by the saltiness from the slightly crispy bacon. While the bacon was sizzling away in the oven, I pan fried the chicken thigh chunks.


These chicken thigh chunks were cut and marinated with Shaoxing Wine, and left in the fridge overnight. I coated the chunks with some cornstarch and salt, and pan fried them with some olive oil. Since they were bite size chunks, they cooked faster than when you fried a whole chicken thigh.


Oily bacon and oily spears of asparagus, with panfried chicken ... unhealthy? I added more vegetables - orange cauliflower. Scoop some rice into the lunchbox and that completes the meal. This is the lunchbox for hubby dear. No Echo-Echo for him =p


Three lunchboxes in one morning. It is no wonder the kitchen was in a terrible mess after packing the lunchboxes. Let's hope the boys, big and little, come home later with an empty lunchbox.

Friday, January 7, 2011

Hello, Panda!


It's Friday, and I can take a break from packing lunch for the next two days! School has started for a week, and I am starting to look like a Panda! Hence, I included a Panda for today's packed lunch!


Pan-fried Chicken

2 Chicken Thigh Fillets, cut into bite-sized pieces
1/2 tbsp Miso Paste (Add more if your miso paste is less salty)
1 tbsp Shaoxing Wine
1/2 tbsp Brown Sugar

  • Mix miso paste, shaoxing wine and brown sugar together in a bowl.
  • Put the chicken pieces into a small ziploc bag.
  • Pour the marinade into the bag and mix well with the chicken pieces.
  • Leave to marinate overnight in the fridge, or for at least 15 minutes.

Cooking the Chicken:

  • Coat a frying pan with some olive oil.
  • When the pan is hot, add the chicken pieces.
  • Pan fry till both sides are a little browned, and cooked.
  • Remove and set aside to cool.

While the chicken was cooling, I started working on the panda, using a slice of cheese and a small sheet of nori. After cutting the ovals for the eyes from the sheet of nori, I looked at the little pieces of nori left on the plate and chose two small pieces that resembled the nose and the mouth. Alternatively, you can use a nori punch, or cut using a pair of scissors.

Hubby dear saw the lunchboxes when Darling son KW was helping me take photographs of the panda. "KUNG-FU Panda!" he said. Phew! Actually, halfway through assembling the panda, I thought I was putting together a racoon =p

Here's the photograph taken by Darling son KW =)


Do you want an apple, Mr. Panda?

Related Posts with Thumbnails