
The cheesecake is soft and cottony, and the chilled version is "melt in your mouth". Finally!


The first time I made this cake, the bottom of the cake had this distinct yellow, agar-agar look alike base. But the body of the cake, at least the upper half, was soft and cottony. It was a failed first attempt, despite the heavenly taste of the cake. We happily ate the upper half of the cake, and threw away the bottom half, sadly.

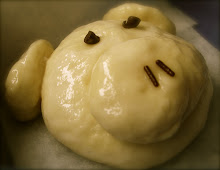
Don't you think the base of this successfully baked cake look like tissue paper? The base of the first cake was no where like the one in the photo =(
Not wanting to admit defeat, I attempted to bake it a second time.
This time, it was better. However, in my hurry, I didn't fold in the flour properly, resulting in tiny lumps of batter. The taste ... still as good, though we couldn't have a full edible cake!
So I tried again, and each time, either the cheese couldn't dissolve properly, or I didn't mix the egg white batter evenly with the cream cheese batter.
Hubby dear would probably say that I'm stubborn, but this "Never Give Up" spirit finally yielded a nice yummy, uniformly baked CheeseCake! It's crazily addicitive!

Here's some points I gathered from my various failed attempts:
- Do not add the egg yolks while the cream cheese mixture is still hot. You definitely do not want the yolks to be cooked in the cream cheese mixture!
- If after stirring for the longest time, you still couldn't get the tiniest bit of cream cheese to dissolve, pour the mixture through a sieve. You will get a smooth and silky cream cheese mixture!

- Make sure the flours are mixed well into the cream cheese mixture. You don't want any lumps in your cottony baked cheesecake.
- Make sure to mix the whipped egg whites evenly with the cream cheese mixture. You do not want streaks of yellow in your cake. However, do not overmix the batters either.
- There is no need to grease the pan. Just line the pan with parchment paper, with sides at least 1.5 inches above the rim of the pan.

- The cake may look baked by the 45th minute, even though the time required is 1.5 hours. Do not take the cake out. Let it bake fully, and tent the top of the cake loosely with aluminium foil if the top of the cake starts to brown too much. Remove the foil during the last five minutes of baking.
Recipe adapted from Aunty Lily's Blog.
100 ml Heavy Whipping Cream or Full Cream Milk
50g Butter
250g Cream Cheese (I use 1 block of 8oz cream cheese, apprx 230g)
60g Al Purpose Flour
20g Corn Flour
6 Egg Yolks
6 Egg Whites
1/4 tsp Cream of TarTar
140g Sugar
- Take the block of cream cheese out to soften at room temperature.
- Separate the egg yolks and egg whites, with the egg whites in a medium mixing bowl.
- Line a 8" square pan with parchment paper, with the parchment paper extending an extra 1.5 inches above the rim of the pan.
- Double boil milk and butter on medium heat.
- When the butter has melted, lower heat and add in cream cheese.
- Remove the bowl of cream cheese mixture from the heat.
- Pour the mixture over a sieve, into a large mixing bowl, to remove the tiny lumps of undissolved cream cheese. The cream cheese mixture has to be in a large mixing bowl as you will be folding in the whisked egg whites later. If your cream cheese mixture is smooth and silky, there is no need for this step.
- Slowly add in the flours and mix well. You don't want any lumps of flours in your cream cheese batter. You should get a smooth mixture. Add the egg yolks and mix well. Set aside the large bowl of cream cheese mixture for later use. In a medium mixing bowl, whisk egg whites till foamy.
- Add the cream of tar tar and whisk on the highest speed.
- Gradually add the sugar as you whisk.
- Continue to whisk the sugar and egg whites till peaks form.
- Use a rubber spatula to fold the egg whites in two batches to the cream cheese mixture.
- Pour the mixture into an 8" pan lined with parchment paper.
- Steam bake in a preheated oven of 300F/150C for about 1 hour 30 minutes.
- If you are using a springform pan, wrap the pan with heavy duty aluminium foil to prevent any water from sipping into the cheesecake during baking.
- Tent the cake loosely with an aluminium foil when the top of the cake starts to brown.
- Let the cake cool in the pan on a cooling rack for 15-20 minutes.
- Turn the cake onto a plate. Remove parchment paper.
- Invert the cake back onto the cooling rack.
- Continue to cool for another hour or so.
- The cake will shrink as it cools.
- Chill the cake in the fridge after the cooling.
Like I said, it's crazily addictive. Darling sons came home from school and had two slices each, the unchilled slices. They brought the chilled slices to school as snacks. There won't many pieces left after that. Seems like I need to bake this cake again!
6 comments:
Thanks for the tips! Just surfed to your site. My 1st cake from yesterday turned out like your first one. Glad to know you perfected it eventually- more reason me to try it again.
Qn- tenting over the cake would mean opening the oven door mid-bake right? Just checking.
Also wondering about the difference in letting the cake cool in the oven (suggested by others) vs your cooling method. Have you tried the former?
Thanks and keep baking :)
-marz
Hi Marz, I did not open the oven door even though I tent the cake around the 60th minute. I let the cake bake without the foil during the last five minutes of baking. Do not worry about overbaking the cake, and remember to beat the egg whites till stiff peaks form.
I have tried letting the cake cool in the oven, with the water bath attached. However, in my opinion, I find that the base of the cake too soggy as condensation forms on the parchment paper as the cake cools. Since the cooling in the oven is for the cake to "firm up", I remove the cake pan from the water bath, and place the cake pan on a cooling rack for about 10 minutes. I remove the cake from the pan when I think it is firm enough, and let it continue to cool on its own. Happy Baking and keep on trying! Once you get it right, you will want to bake it again and again =)
What an awesome recipe! This is probably at least the 3rd Japanese cheesecake recipe I've tried and this one was perfect.
I used an 8" sq. glass pan and found I needed to grease it so the parchment paper would stay in place.
I did not have to tent it at all. I baked it 1 hr. 40 minutes because I was still getting a few crumbs with toothpick at 1 hr. 30 min. However, next time I think I will bake it a little longer, like 1 hr. 50 minutes just to make sure it doesn't have any wet spots...mine had a few but not too much.
I did not have heavy cream so sub. half-n-half. I did add 1/4 t. sea salt and next time may increase to almost 1/2 teaspoon. I also added 1/2 t. vanilla but may add a bit more next time as well.
I did sift the flour and cornstarch.
For those interested in US measurements, 100ml cream comes to just less than 1/2 C.
50g butter = 3 1/2 Tablespoons
I used one block cream cheese, 8oz.
60g flour = 1/2 C.
20g cornflour = 2 T. plus 1 t. cornstarch
140g sugar = 1/2 C. plus 2 T. and the sugar I gave a whirl in the food processor so it's finer and dissolves easily/completely in egg whites.
Great instructions and recipe!
Mrs.Chiu
Hi Mrs Chiu! Wow, you don't have to tent the cake! How lucky! I'm always worried that I may burn the top of the cake. Thanks for sharing with us the conversion! Easier than taking out the weighing scale! I will definitely try out using these conversions =D
One more thing I'd recommend is that you add the egg yolks to the cooled cream cheese mixture and combine well BEFORE adding in the flour and cornstarch. This will prevent activating the gluten in the flour...I wonder if that was the cause of the agar-agar looking yellow bottom of cake on your first try...or maybe it was just not thoroughly combined with egg whites?
Mrs.Chiu
Thanks for the tip, Mrs Chiu. I think the yellow agar-agar layer was due to the fact that I didn't whip the whites enough, and also not mixing the whites thoroughly with the cream cheese mixture. But I think it's a good idea to mix the yolks into the cooled cream cheese mixture before adding in the flours =D
Post a Comment